


How To Make Handmade Ciabatta Bread
This put up will educate you learn the way to make a crusty, open-crumbed loaf of ciabatta bread. Underneath you’ll be able to see an in depth data crammed with concepts and suggestions along with a troubleshooting half with options to FAQs that may help you make a loaf of ciabatta bread with a crisp, golden exterior, and a light-weight, ethereal crumb. Video steering, too!
Mates, instantly I’ve a saga to share with you, one which fortunately ends thankfully: with a crusty, open-crumbed loaf of ciabatta bread, the recipe for which I hope you make rapidly after which all summer time season prolonged, for seashore lunches and mountain hikes, for dinner with household and associates, possibly beside a fire or under twinkling bulbs strung from tree to tree, a pool of olive oil on the in a position to dunk into at will. This has become one amongst my favorite do-it-yourself bread recipes.
Seize a cup of tea, let’s start from the very best …
After posting this sourdough ciabatta bread recipe in April, I felt determined to make a comparable, yeast-leavened variation. For causes I can’t make clear, after I revisited a recipe I had posted proper right here years up to now, the photographs for which appeared promising, I couldn’t get it to work pretty as correctly. The rolls, whereas tasty, had a superb, closed crumb, not as delicate or as open as I remembered (or as pictured).
Looking for that additional wild, amorphous crumb, very similar to that of a do-it-yourself baguette, I turned to my quite a few bread baking books, particularly The Bread Baker’s Apprentice, which well-known that ciabatta sometimes is made with a poolish or biga, meaning a small amount of flour and water mixed with a leavening agent and left to ferment for a short time-frame.
This obtained me pondering: could I change the 100 grams of sourdough starter throughout the sourdough ciabatta recipe with 100 grams of poolish? I gave it a go, stirring collectively 50 grams each flour and water with 1/2 teaspoon instantaneous yeast after which letting it sit for 3 hours. When the ground of the poolish was dimpled with holes, I proceeded with the recipe, together with water, salt, and flour; mixing the dough; stretching and folding it; letting it rise, and finally transferring it to the fridge in a single day.
The subsequent morning, I turned the dough out onto a floured work flooring, decrease it into eight elements, and transferred them to a sheet pan. One hour later, I baked them.
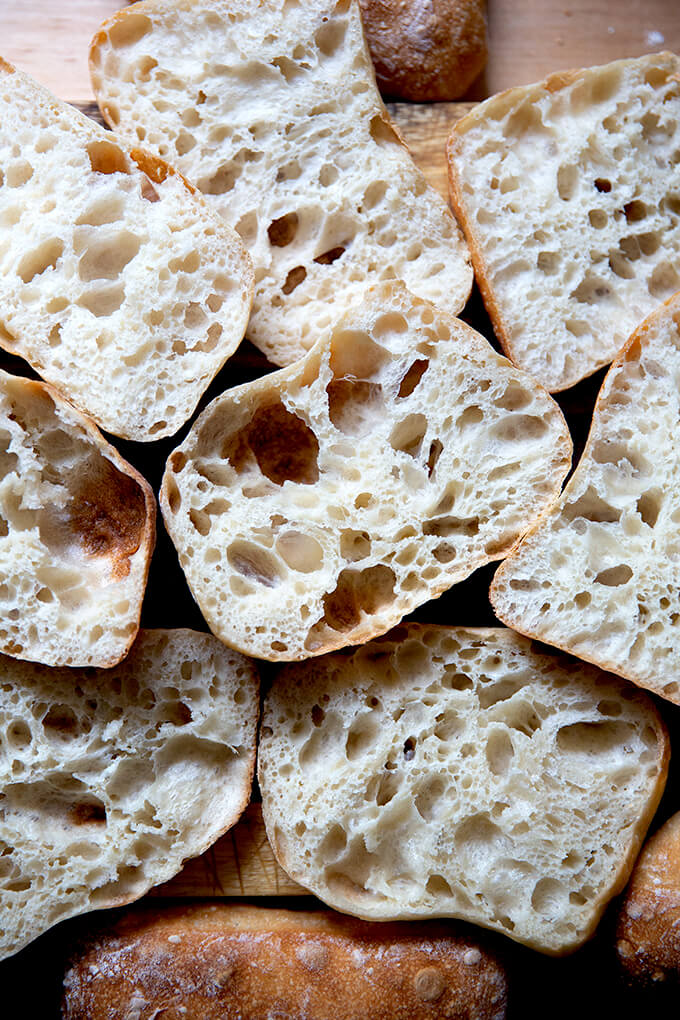
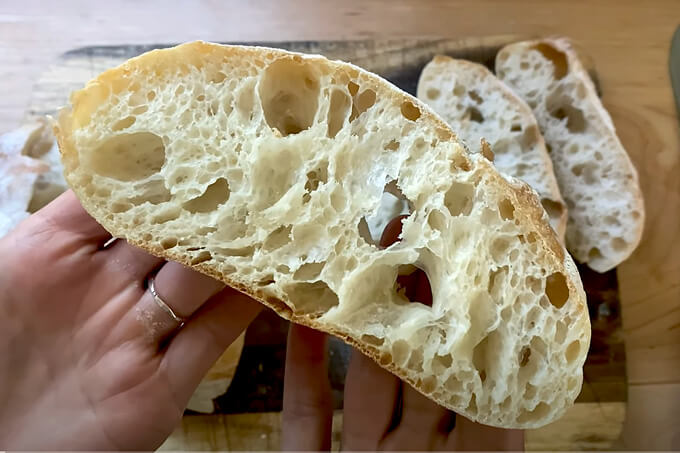
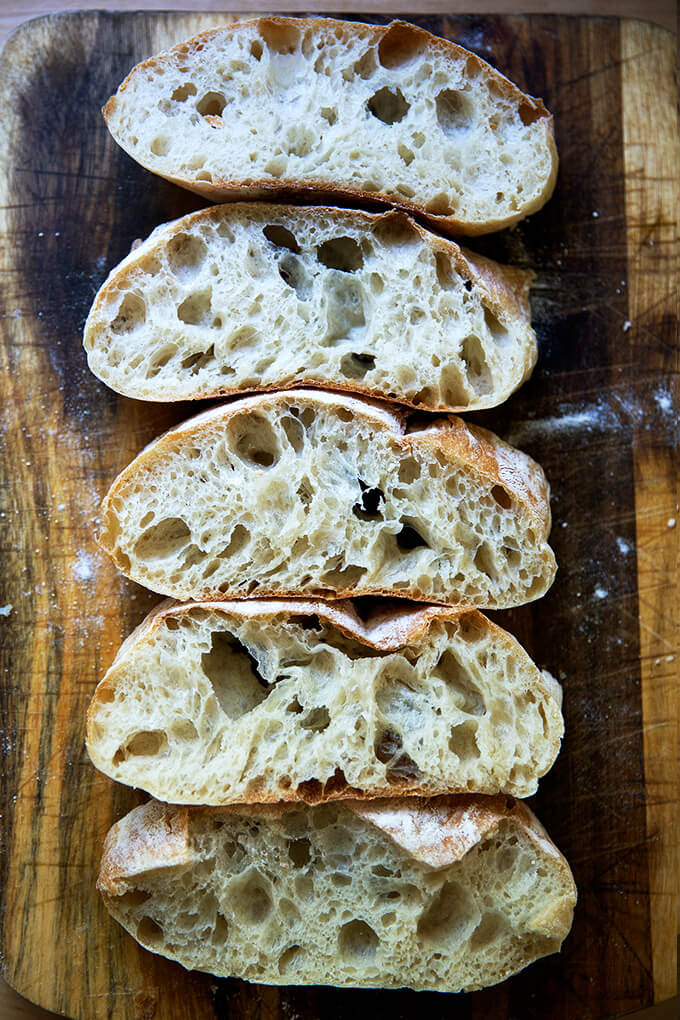
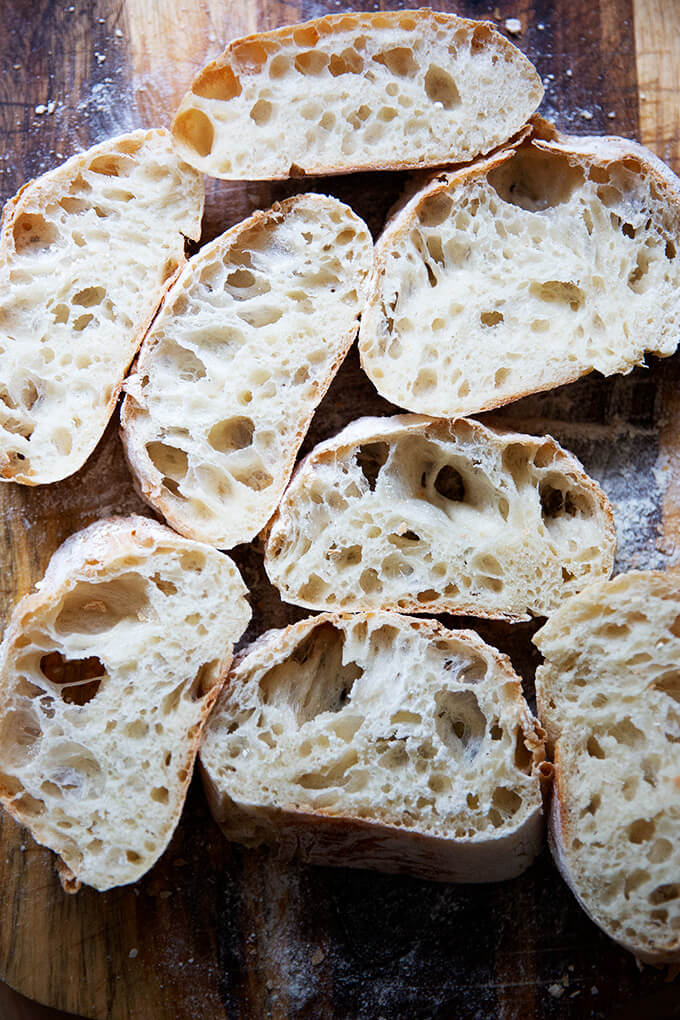
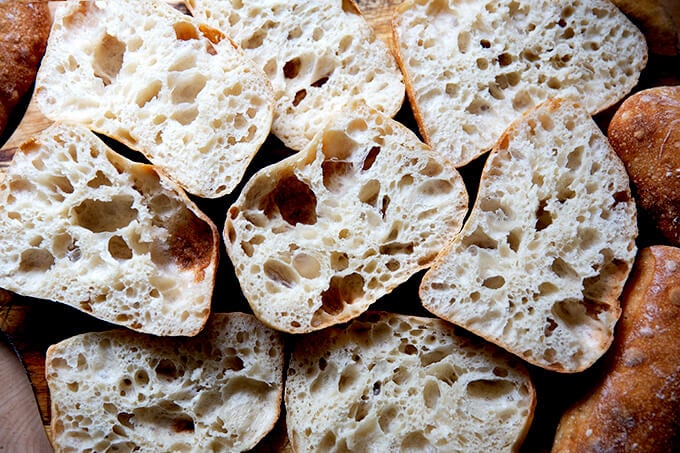
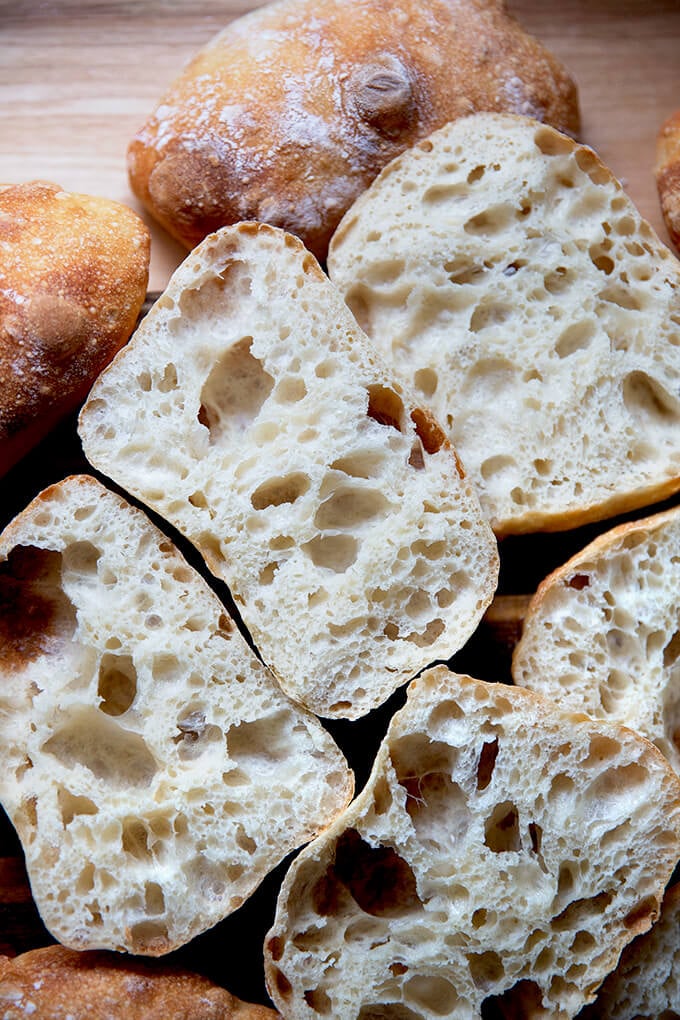
Mates! It labored fantastically. The crumb, whereas not pretty as honeycombed as a result of the sourdough mannequin, was crammed with holes, giving the ciabatta its attribute lightness and airiness. I felt really good regarding the recipe — it was simple enough, virtually equal to the sourdough mannequin with out having to utilize a sourdough starter, and actually tasty.
I just about posted the recipe nonetheless anticipating that some of us could want a loaf of ciabatta versus rolls, I decided to examine the recipe in loaf variety.
That’s the place the saga begins. The two loaves I pulled from the oven, whereas crusty and pleasant from the skin, had been … HOLLOW! I had baked, in essence, two gigantic pita breads, good for housing torpedo-sized falafel. (Hold tuned … the saga continues! Kidding.)
This experience despatched me on a tear to find out the place I went flawed. As I look at “tunneling”, I tried many points to restore the state of affairs — decreasing the hydration, rising the hydration, kneading the dough, decreasing the oven temperature, decreasing the amount of yeast, eliminating the chilly proof — and throughout the course of, I made many many loaves of gap ciabatta. On the hazard of sounding a bit bit dramatic, this quest paralyzed me creatively — really: with out this ciabatta puzzle solved, I couldn’t create a single new recipe for the weblog.
In the long term, after doing a bit additional digging, the restore was simple: to elongate the last word proof. Whereas the sourdough ciabatta can rest at room temperature for underneath an hour sooner than baking; the yeasted ciabatta — a minimum of in loaf variety — needs far more time, additional like 2 to 2.5 hours.
Why? Because of, as I’ve found, when under-proofed dough enters an oven, the yeast has loads of remaining energy, which ends up in fast and furious gas manufacturing. This explosion of gas breaks the development of the bread, inflicting the tunnel to variety.
As rapidly as I extended that room-temperature proof, the tunnels, thankfully, vanished.
Mates, if I’m being honest, it isn’t with out trepidation that I put up this recipe. As I variety, I’ve two bowls of ciabatta dough rising — merely to make sure! I’ve made additional ciabatta these earlier two months than another bread I really feel ever (with the exception, actually, of my mother’s peasant bread), and though I am now persistently met with good outcomes — with loaves that emerge from the oven flour-dusted, golden-crusted with every a chewy and light-weight, porous texture — I nonetheless concern. These gap loaves haunt me.
As you’ll see, I’m a bit anxious for you all to supply this recipe a try. My need, as well-known to start with, is for this to vary into your summer time season dinner bread, your trusty swiper for all these delicious, oily, corn-studded, tomato-infused, basil-specked dregs. They deserve it.
For many who give it a go, please let me understand how it appears.
PS: Foolproof Pita Bread Recipe
PPS: In a single day Fridge Focaccia = The Biggest Focaccia
Typical Ciabatta: An Overview
Let’s consider what ciabatta is:
- Typical ciabatta is characterised by a slipper type along with a very porous and chewy texture. Originating from the Lake Como space of northern Italy, ciabatta means “slipper” in Italian.
- Ciabatta dough is moist and sticky with hydration ranges sometimes 80% or bigger. Every the recipe underneath and this sourdough mannequin are 82% hydration. (When you’re unfamiliar: To calculate hydration share, merely divide the burden of the water by the burden of the flour; then multiply it by 100. On this recipe, that’s 410/500=0.82 | 0.82 x 100 = 82%)
- Typical ciabatta recipes identify for little or no yeast and a protracted, sluggish rise. Many recipes identify for making a biga or poolish (as well-known above), which helps produce that delicate, ethereal texture.
- Some ciabatta recipes identify for milk or olive oil, nonetheless neither of these substances is required to make a standard loaf of ciabatta.
And let’s consider what ciabatta isn’t:
- Fashioned! Throughout the ciabatta bread recipe in Jeffrey Hamelman’s Bread, he notes: “There is not a preshaping or final shaping—as quickly as divided, the dough is simply positioned onto a floured work flooring for its final proofing.” With the sourdough ciabatta bread recipe, I adjust to this no-shaping rule. On this yeasted recipe, I deviate! After quite a lot of experiments, I favor doing a pre-shape — it’s counterintuitive nonetheless I actually get a additional open crumb after I preshape the dough. That acknowledged, for ciabatta rolls, I stick with the no-shaping rule — it’s good not having to ball up 8 elements of dough. (Actually, you’ll experiment and see which method you need best.)
- Scored! Not like completely different crusty loaves of bread, ciabatta simply is not scored.
Troubleshooting
In case your dough does not cooperate the first time spherical, likelihood is you will should make some modifications:
- Water: It’s a very high-hydration dough, and counting on the flour you could be using and your environment (in case you occur to remain in a moist environment, as an illustration), likelihood is you will need to reduce the amount of water. If, for example, when doing all your stretches and folds, the dough on no account bought right here collectively in a cohesive ball, I’d reduce the water by 50 to 60 grams subsequent time spherical.
- Flour: All flours soak up water another way. By troubleshooting with of us all over the place on the planet sometimes with of us making this sourdough pizza recipe, this yeast-leavened pizza recipe, and most not too way back this sourdough ciabatta recipe, the sort of flour getting used performs an important perform in how the dough appears. Usually the water should be lowered considerably for the dough to return collectively. For many who keep abroad or in Canada, you’ll each make the recipe as quickly as as written or add the water slowly, mixing as you do, until the dough resembles the dough throughout the video.
- Shaping: Because of that’s such a moist dough, shaping is also robust. I’ve clear, wooden counter tops (there’s some type of sealant on excessive) that work correctly for shaping, and I take into consideration granite and marble would work correctly, too. My mother loves her Roul’ Pat for shaping. All of that’s to say, in case you’re having problem shaping, the ground you could be shaping on could be participating in a process.
The proper strategy to Make Ciabatta Bread, Step by Step
Step one of many recipe requires making the poolish. To take motion, gather your substances: flour, water, and instantaneous yeast. SAF is my alternative.
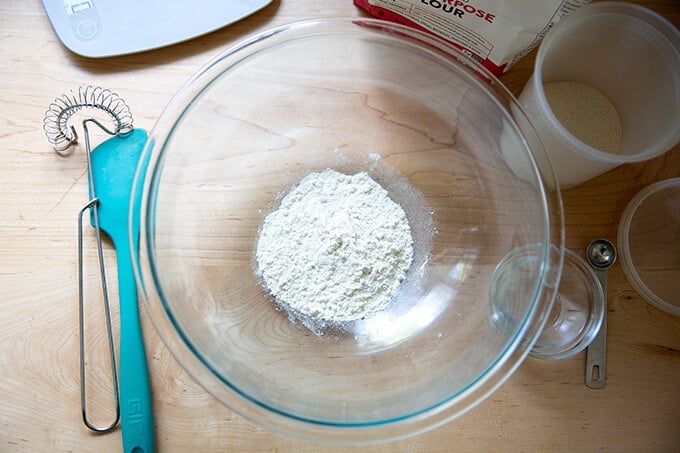
Whisk collectively 50 grams flour and 1/2 teaspoon instantaneous yeast.
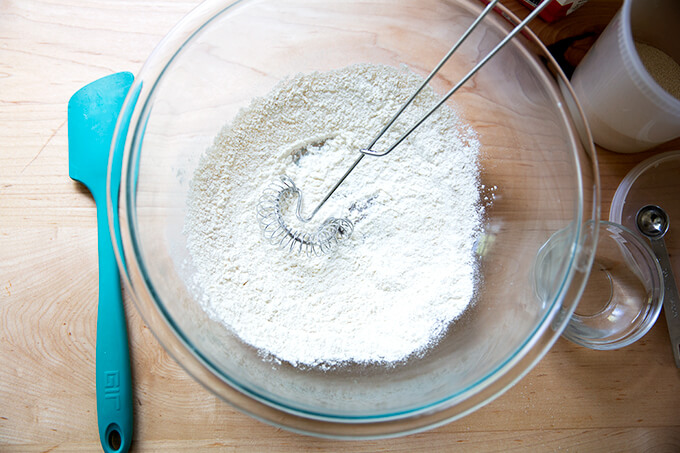
Add 50 grams water.
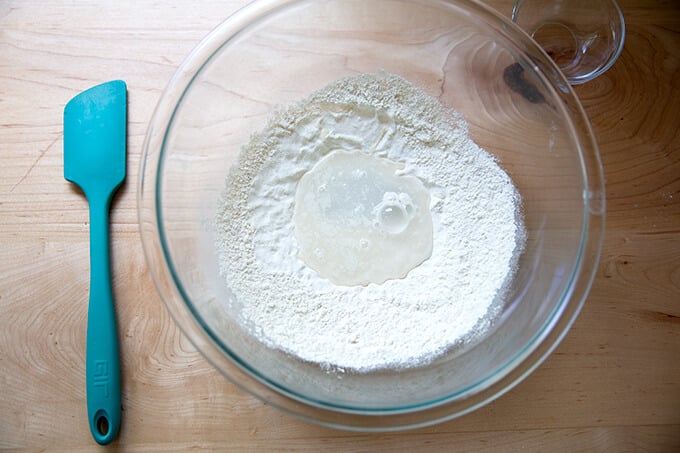
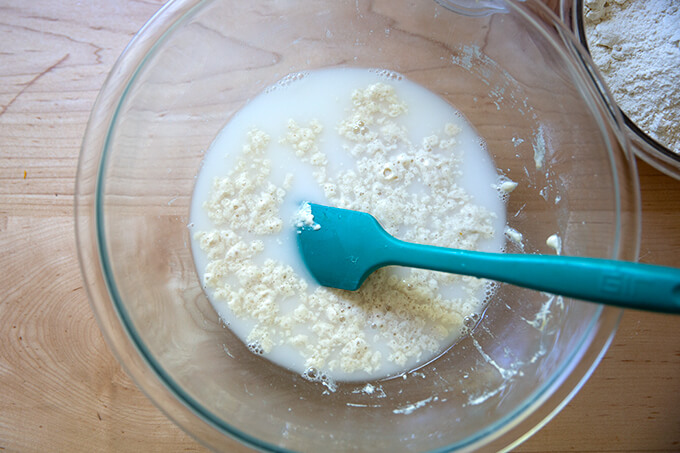
Stir to combine. Cowl the bowl and let sit for 3 to 4 hours or until…
… the ground of the dough is dimpled with air pockets.
Add 360 grams water. (This half is de facto pleasant … the poolish bubbles up as a unit and floats on excessive of the water… it really feels alive!)
Stir to combine; then add 12 grams salt and stir as soon as extra to combine.
Add 450 grams flour, ideally bread flour.
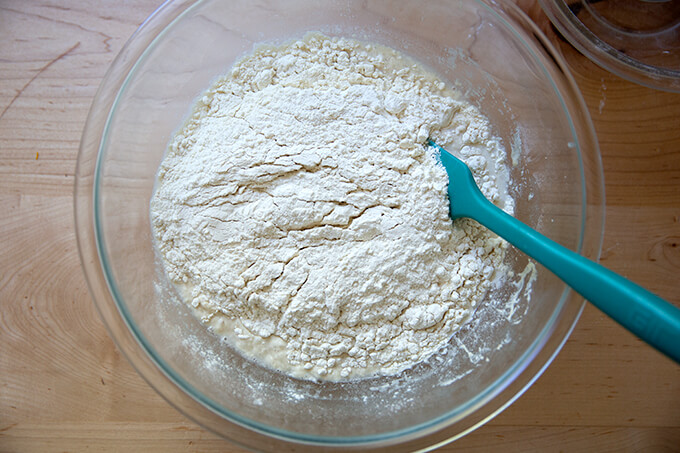
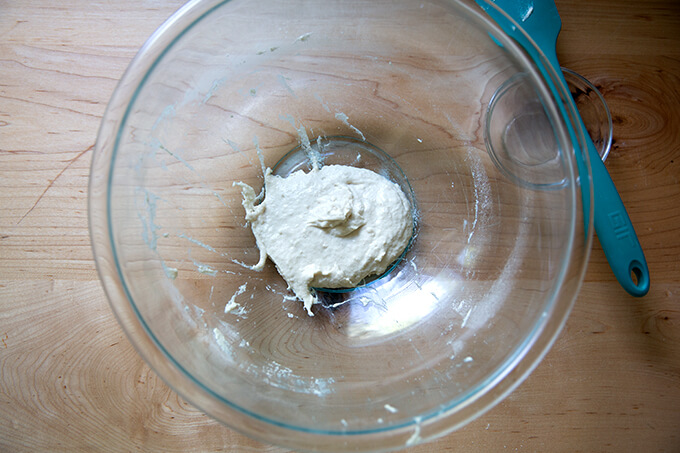
Using a spatula, stir until you may have a sticky dough ball. Cowl and put apart for half-hour.
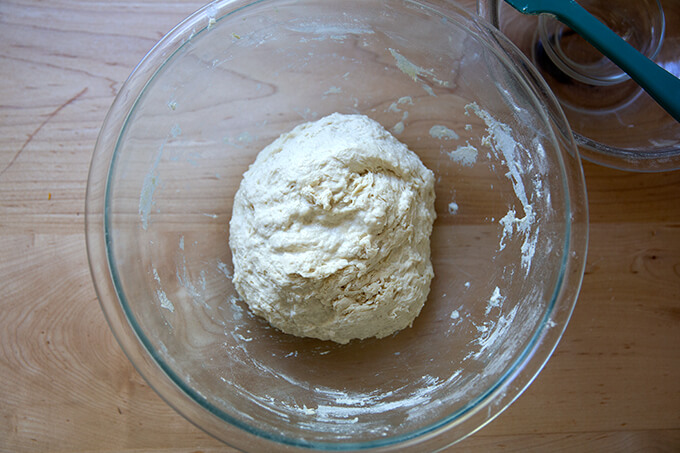
With moist palms, perform a set of stretches and folds, by grabbing one side of the dough, and pulling it up and to the center. Rotate the bowl 1 / 4 flip, and repeat the grabbing and pulling. Try this until you’ve made a full circle. (Watch the video for additional steering. I make use of a type of “slap and fold” method, which is beneficial with this very moist dough.) Cowl the bowl.
Thirty minutes later, repeat the stretching and folding.
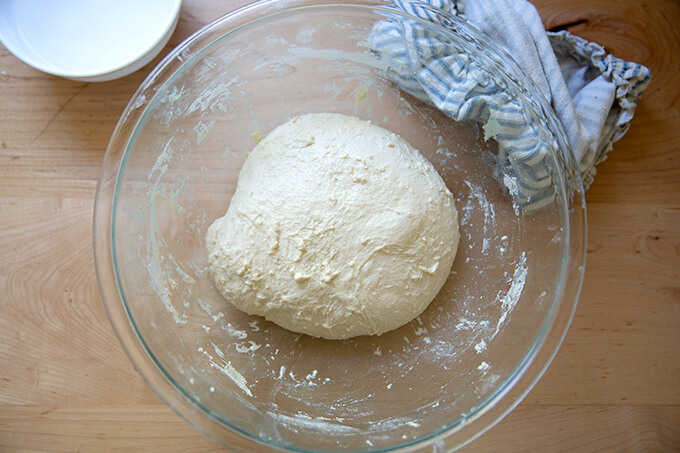
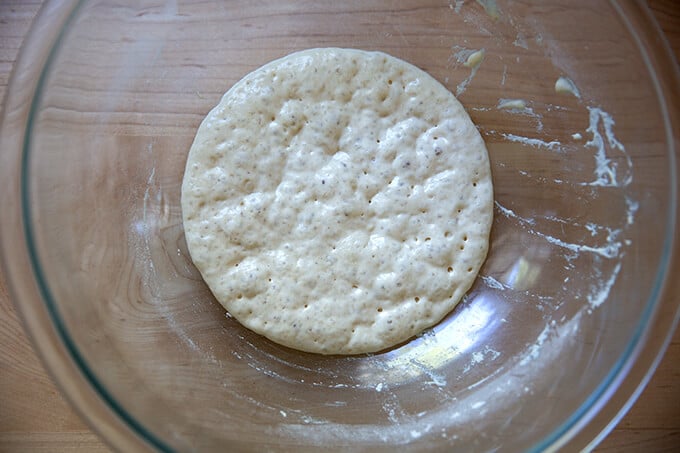
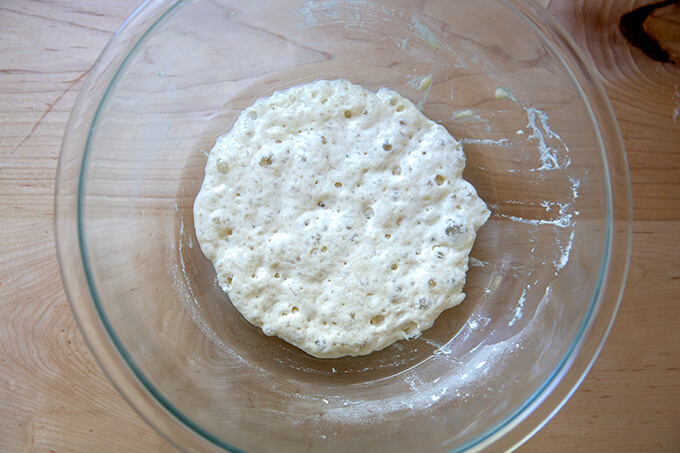
If time permits, repeat this stretching and folding twice additional at 30-minute intervals. That’s what the dough seems like after the third set of stretches and folds:
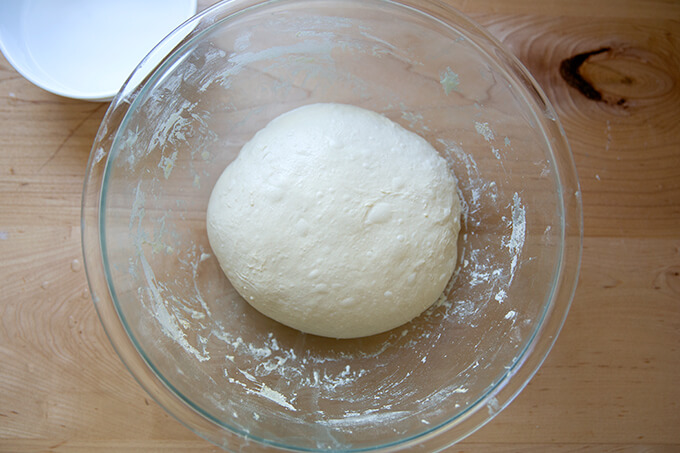
That’s what the dough seems like after the 4th set. Feeling the dough rework from a sticky dough ball to a clear and elastic one is de facto cool.
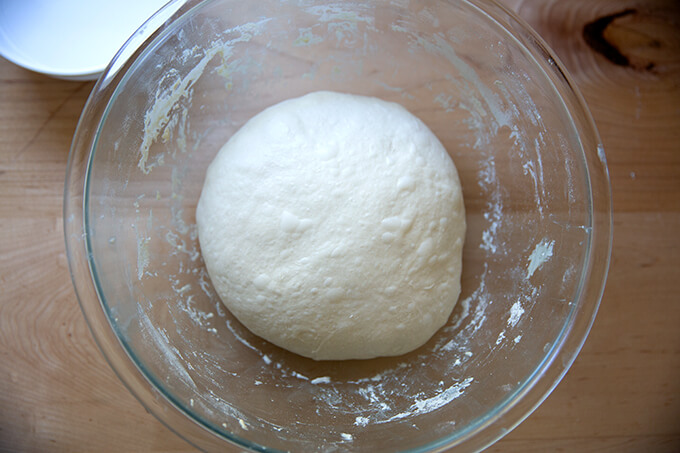
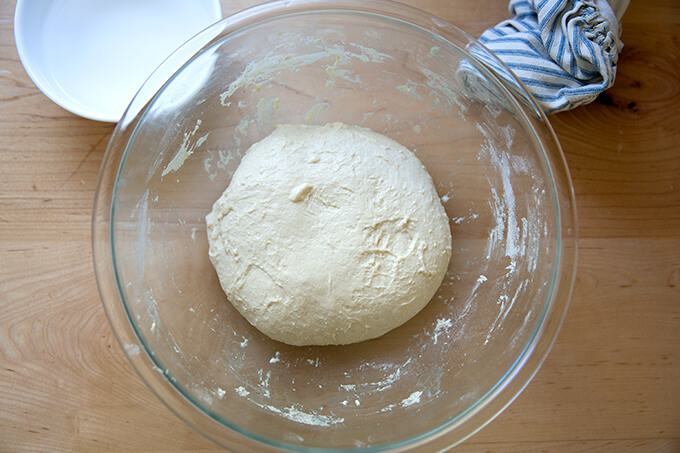
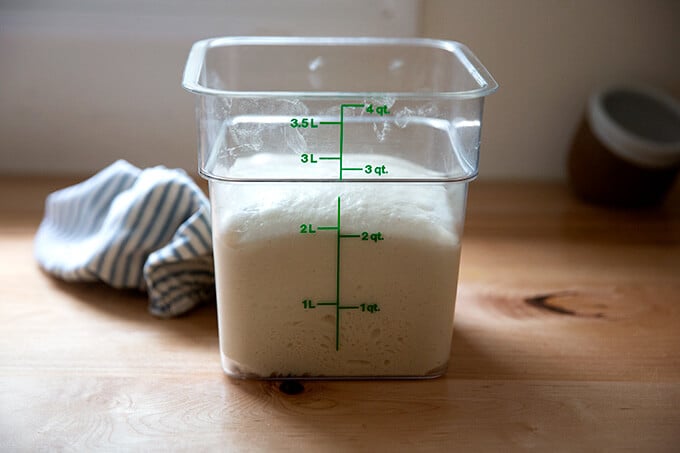
Change the dough to a straight-sided vessel and let it rise at room temperature until…
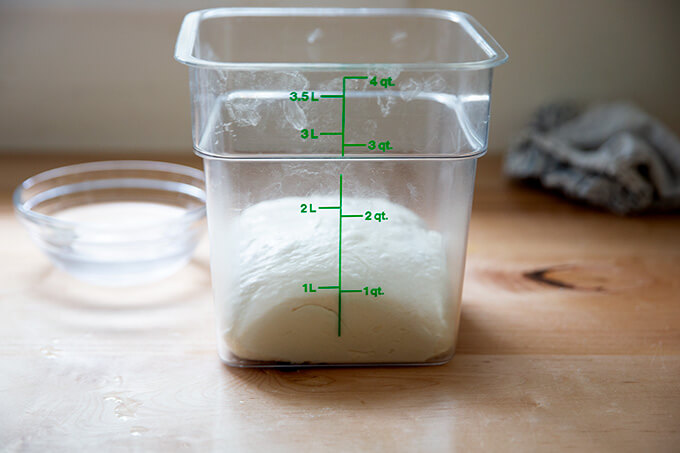
… it doubles in amount. (Bear in mind: For many who don’t have a straight-sided vessel, you’ll merely let the dough rise in a bowl. I personally like using a straight-sided vessel because of it permits me to see when the dough has really doubled in amount.)
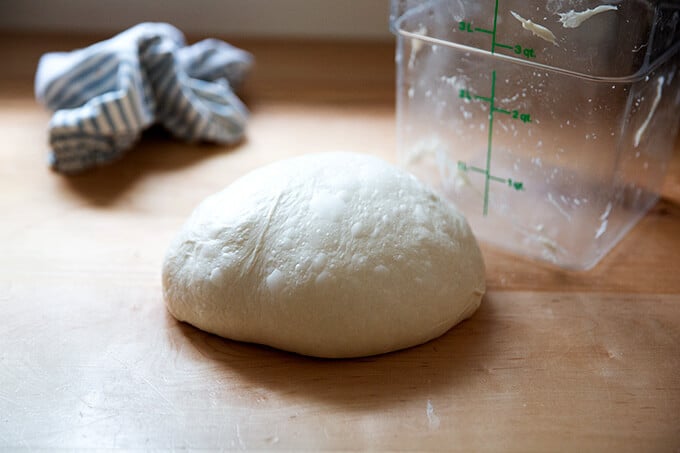
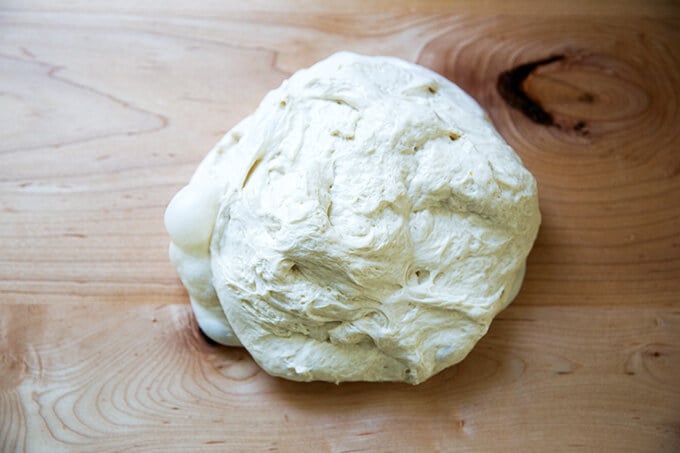
Then, punch down (deflate) the dough — I choose to remove the dough from the vessel …

… and ball it up using moist palms.
Return the dough to the vessel; then change to the fridge. (One different plus of using the straight-sided vessel is that it’s less complicated to retailer throughout the fridge than a bowl.)
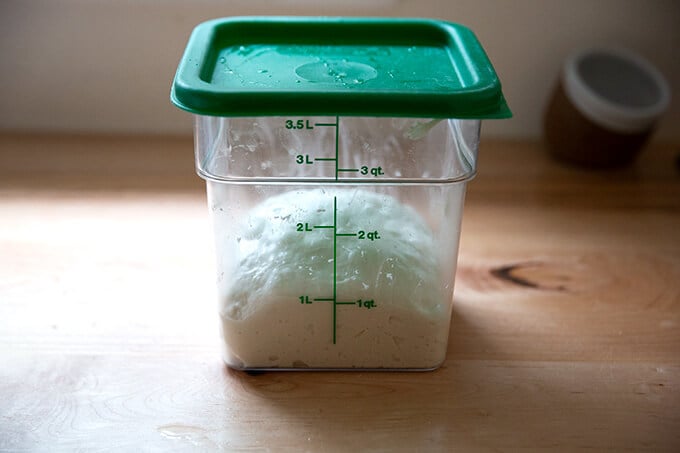
The dough will seemingly double in amount in a single day throughout the fridge.
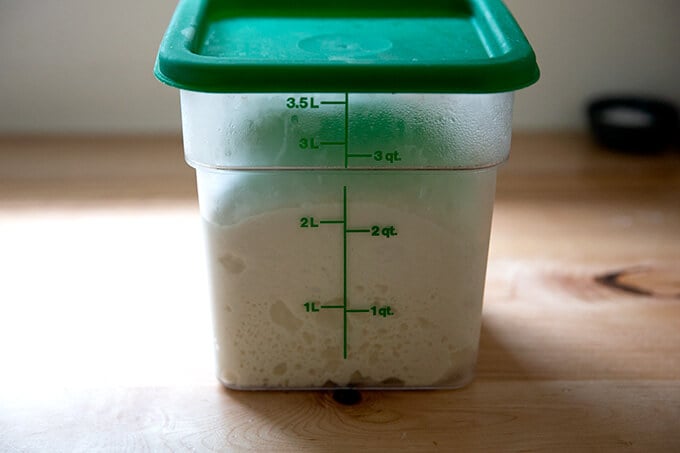
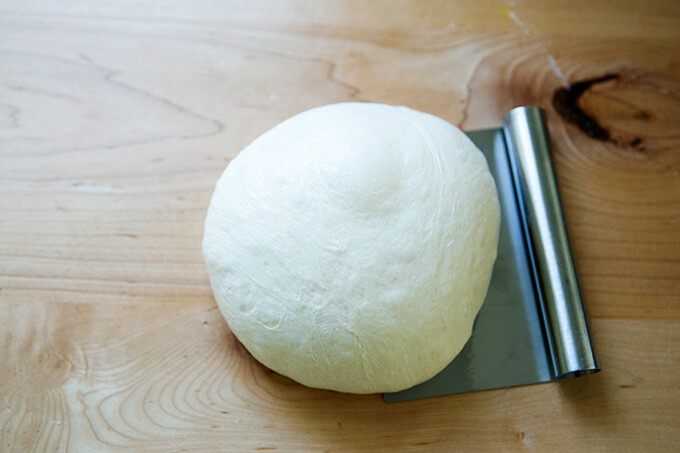
Take away the dough, flip it out onto a bit flooring…
… then ball it up. (Bear in mind: That’s the place I deviate from the usual ciabatta-making method. If I had been to adjust to the usual path, I may need merely patted that blob of dough pictured above proper right into a rectangle; the decrease it in half. I uncover I get a additional open crumb after I preshape the dough.)
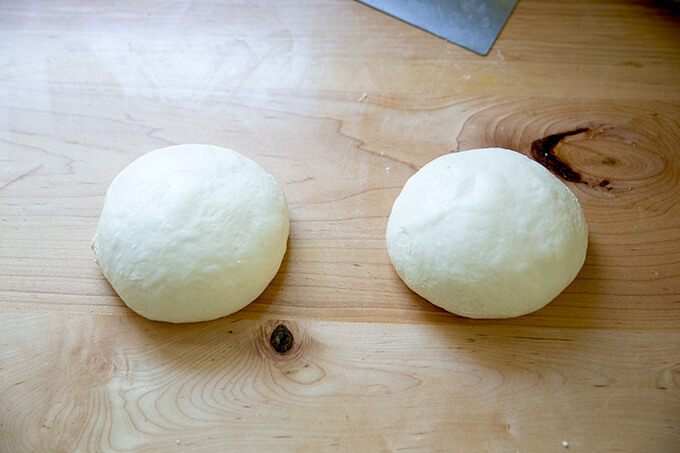
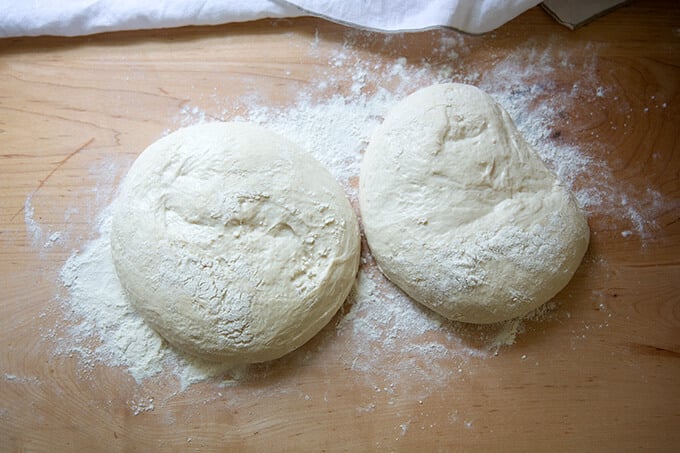
Divide the dough into two equal elements. Ball up each portion. I like to try this with little or no or no flour — I uncover I get larger rigidity with a lot much less flour.
Sprinkle a bit flooring liberally with flour. Place the balls top-side down (the glossy side); then sprinkle the balls liberally with flour. Cowl with a tea towel and let rest for 2.5 hours. Line a sheet pan with parchment paper.
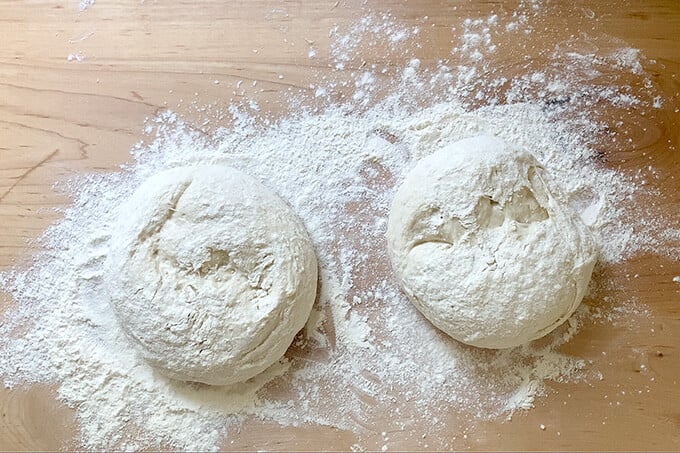
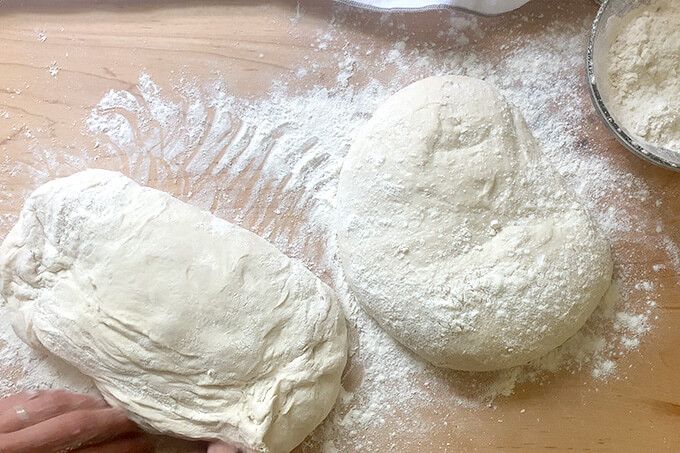
After the 2.5 hours… the dough balls will look like this:
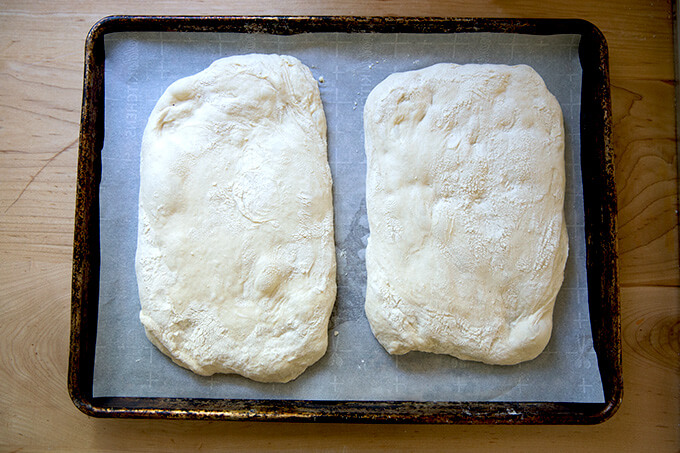
Flip the balls once more over…
… then rigorously change them to a parchment lined sheet pan.
Bake at 425ºF for 20-25 minutes or until correctly golden:
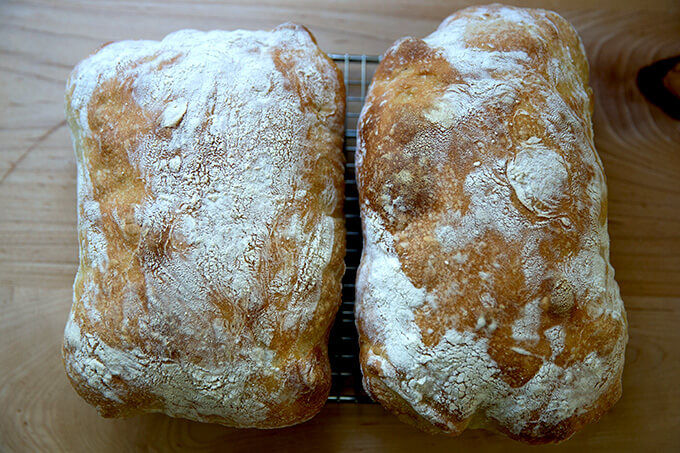
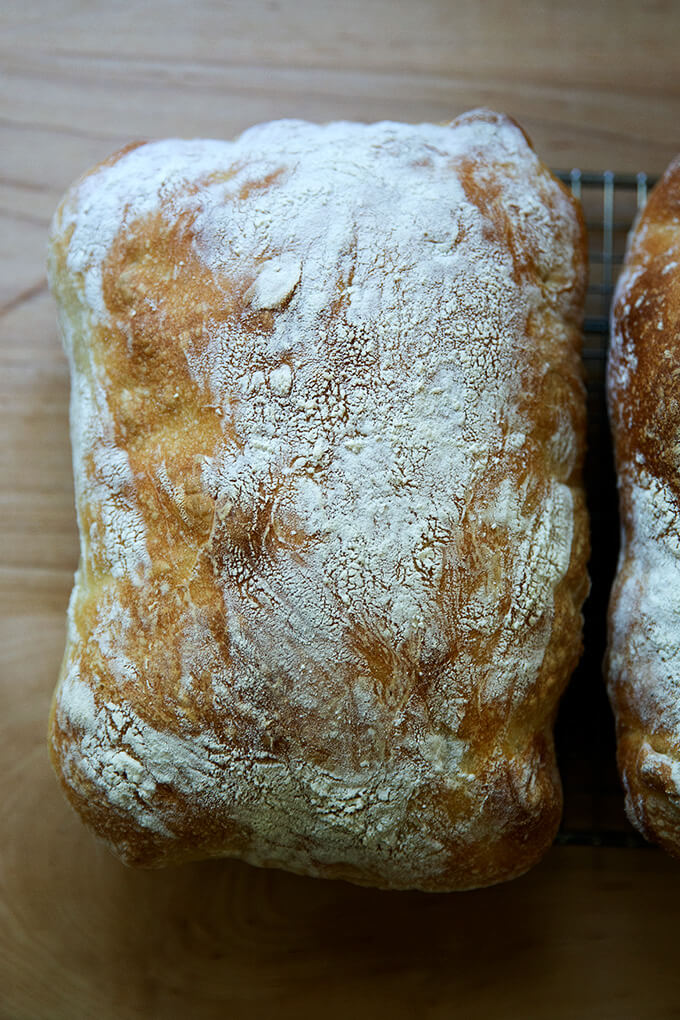
Let cool a minimum of 20 minutes sooner than slicing.
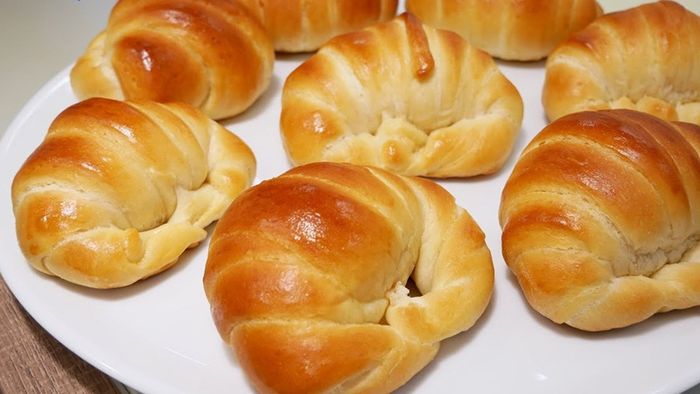
The proper strategy to Make Ciabatta Rolls
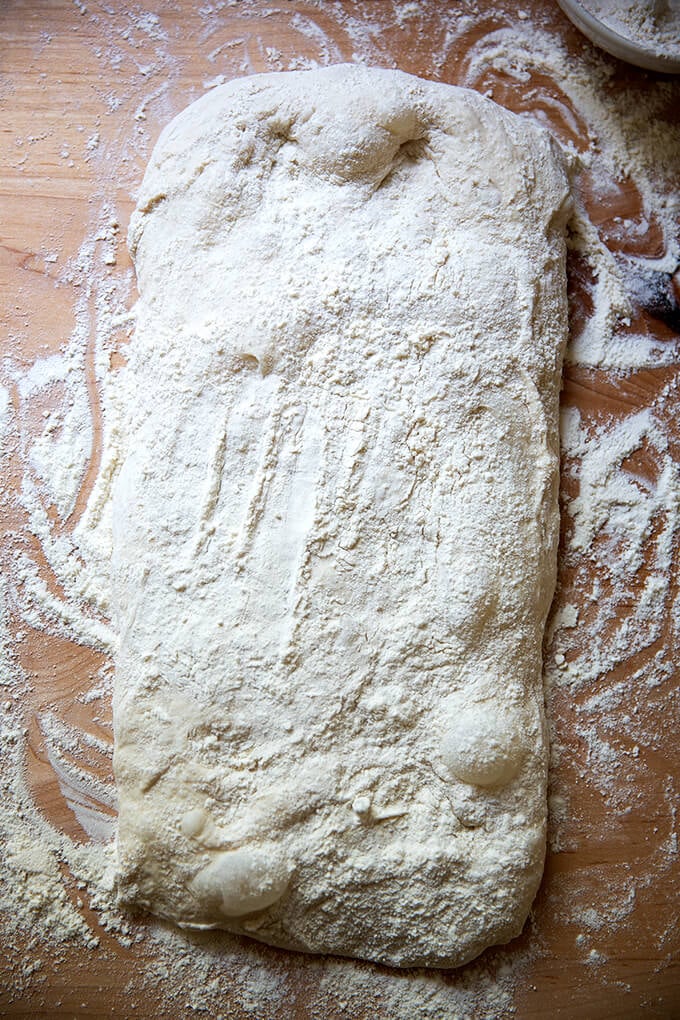
Adjust to the recipe as outlined above or throughout the recipe discipline underneath until the step whereby you are taking away the dough from the fridge; then, sprinkle a bit flooring with flour. Flip the dough out, sprinkle the ground with additional flour, and pat it proper right into a rectangle. (Bear in mind: This system, in distinction to above, follows a standard ciabatta method — there’s no preshape or final type. I favor doing this with rolls for simplicity. It’s good not having to ball up 8 elements of dough. In order for you, actually, you’ll ball up each spherical of dough.)
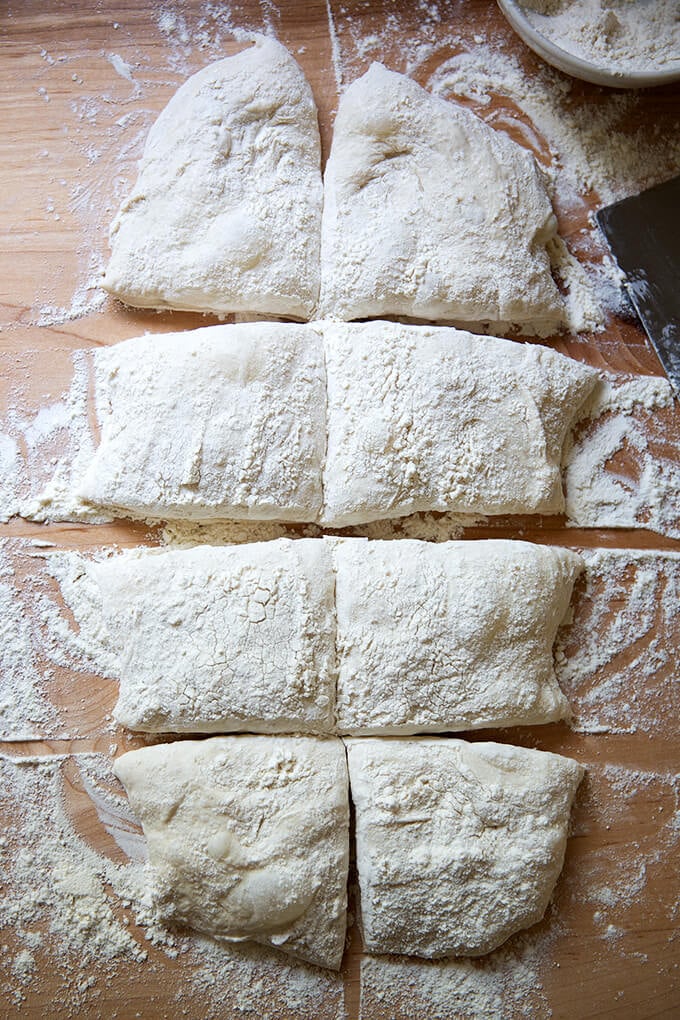
Divide into 8 elements.
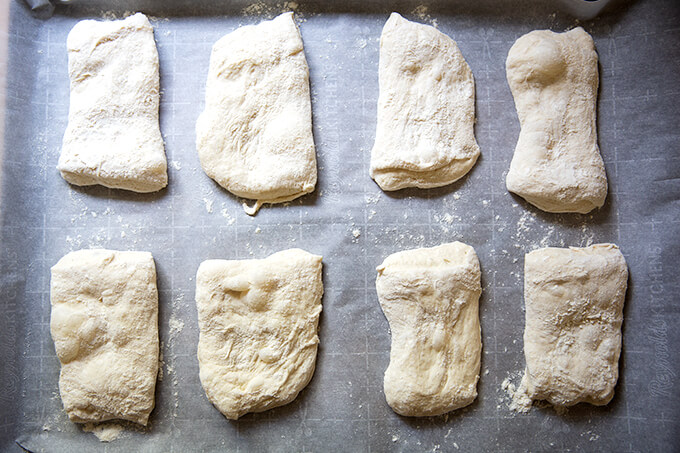
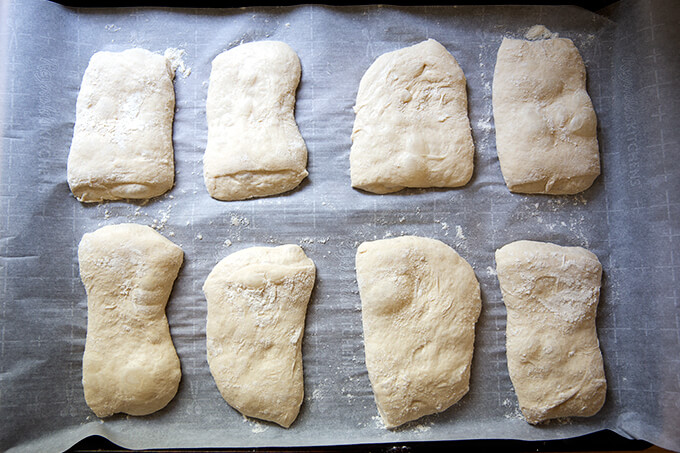
Change to a sheet pan, cowl with a tea towel, and let stand for 2 to 2.5 hours.
Change the pan to the oven, and bake at 425ºF for 20 to 25 minutes.

Let cool for a minimum of 20 minutes sooner than halving or slicing.

Description
This put up will educate you learn the way to make a crusty, open-crumbed loaf of ciabatta bread. It requires making a poolish (a preferment), and it’s a extremely extreme hydration dough (82%), which suggests the dough could be moist and sticky. I extraordinarily recommend watching the video sooner than attempting the recipe.
Notes:
- As always, for best outcomes, use a digital scale to measure the flour.
- I’ve had success using all-purpose flour, however when chances are you’ll get your palms on bread flour (I benefit from King Arthur Flour Bread Flour, which is 12.7% protein), that is supreme, notably in case you occur to remain in Canada or abroad. For many who keep abroad or in case you occur to remain in a moist native climate, this will often take a try or two to get correct — I like to recommend making it as quickly as as written; then decreasing the water by 50 grams or so relying in your outcomes.)
- I uncover a bench scraper considerably helpful for this recipe.
- I moreover really love using a straight-sided vessel (with lid) every for letting the dough rise and storing it throughout the fridge.
For the sponge:
- 50 grams (about 1/3 cup) all-purpose flour
- 2 grams (1/2 teaspoon) instantaneous yeast, SAF is my alternative
- 50 grams (about 1/4 cup) water, lukewarm or room temperature
For the ciabatta dough:
- 360 grams (about 1.5 cups) water, lukewarm or room temperature
- 12 grams (about 2 teaspoons) salt, kosher or sea salt
- 450 grams (about 3.5 cups) bread flour, see notes above
- Make the poolish: In an enormous bowl, whisk collectively the 50 grams flour and the 2 grams (1/2 teaspoon) instantaneous yeast. Add 50 grams water and stir with a spatula until blended. Cowl the bowl with a tea towel or cloth bowl cowl and put apart for 3 to 4 hours or until the dough’s flooring is dimpled with holes.
- Make the dough: To the bowl of the poolish, add the water. The sponge must launch from the bowl and components of it, if not all of it, will float. Add the salt and stir briefly. Add the flour, and stir until you may have a moist, sticky dough ball — dough could be very sticky. Cowl with a tea towel or cloth bowl cowl and let sit for half-hour.
- Stretches and folds: With moist palms, seize one side of the dough, and pull up and to the center. Rotate the bowl 1 / 4 flip, and repeat the grabbing and pulling. Try this until you’ve made a full circle. (Watch the video for additional steering. I make use of a “slap-and-fold” method, which is beneficial when coping with these moist doughs.) Cowl the bowl. If time permits, repeat this course of three additional events at 30-minute intervals for a whole of 4 models of stretches and folds over the course of two hours. When you’re fast on time, know that doing just one or two models of stretches and folds is totally implausible.
- Let it rise: Change the dough to a straight-sided vessel, once you’ve bought one, or depart it throughout the bowl in case you occur to don’t. Cowl the vessel with a towel and let rise until doubled in amount. Punch down (deflate) the dough — in case your dough continues to be throughout the bowl, you’ll deflate it using moist palms correct throughout the bowl; in case your dough is in a straight-sided vessel, it might be less complicated to point out the dough out onto a bit flooring and ball it up using moist palms to forestall sticking. Return the dough to the vessel, cowl it with an airtight lid, and change it to the fridge immediately for a minimum of 12 hours. The dough can keep throughout the fridge for as long as 48 hours.
- Portion and type: (Bear in mind: That’s the place I deviate from typical ciabatta bread recipes. See notes throughout the put up above for the additional typical shaping method.) Flip the dough out onto a bit flooring. I favor to try this step with out flour, nonetheless utterly sprinkle your flooring evenly with flour as wished to make the dough manageable to work with. Using a bench scraper or your palms, type the dough into a superb ball; then use the bench scraper to divide the dough in half. When you want utterly even balls, each portion will means roughly 455 grams. As soon as extra, use the bench scraper or your palms to ball up each portion into a superb ball — see video for steering.
- Proof: Sprinkle your countertop liberally with flour. Place the balls top-side (clear side) down onto the flour. The seam-side could be on excessive now, and it might lower up open — that’s implausible. Sprinkle the very best flooring of the balls liberally with flour. Cowl with a tea towel and let rest for 2.5 hours. After 2 hours of proofing, heat the oven to 425ºF.
- Line a sheet pan with parchment paper. When the dough has accomplished proofing, gently flip each ball over — I uncover a bench scraper to be helpful proper right here. Then use every palms to stretch each ball out gently into an rectangular fashioned “slipper”. Change to the prepared pan.
- Bake for 20 – 25 minutes or until the loaves are golden all through. Take away pan from oven. Change ciabatta rolls to a cooling rack. Let cool for 20 to half-hour sooner than slicing.
- Prep Time: 24 hours
- Put together dinner Time: 20 minutes
- Class: Bread
- Methodology: Yeast
- Delicacies: Italian, American


